Introduction: Water in the Wet Tank After Humid Standby
An airport crash tender that has sat on humid standby can collect liquid water in its wet tank even when the air dryer appears to be working. Finding the source means working the air system from the compressor forward and checking each stage in order.
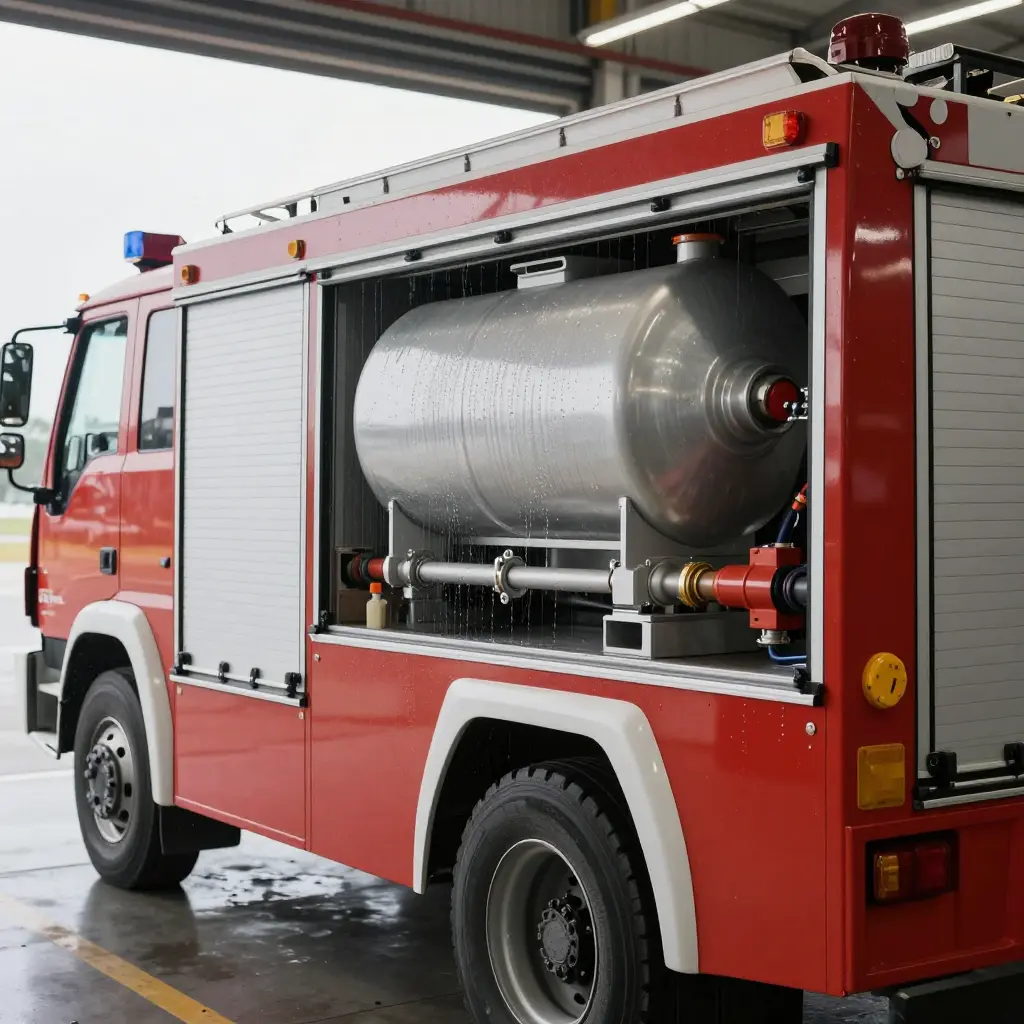
The wet tank is the first reservoir downstream of the dryer, so air reaches it before it is split to the primary and secondary brake circuits. Any moisture that survives the cartridge condenses there first, which makes the tank drain the most reliable place to confirm that drying has failed. The dryer is the usual first suspect, but a unit that looks and sounds normal can still be passing wet air.
A dryer that runs is not proof of dry air. The wet tank drain is the test that settles it.
Long humid standby is a common trigger. Sitting idle in warm, moist air, the desiccant bed saturates while purge cycles come too rarely to regenerate it. A saturated bed then passes moisture straight to the wet tank, where it condenses and pools. That is why the complaint usually arrives after a quiet stretch rather than during an active shift.
A crash tender’s air system is a chain of pressure vessels with a single active drying stage. Knowing where each part sits and what it is supposed to do makes the water in the wet tank explainable.
Compressor and Discharge Line
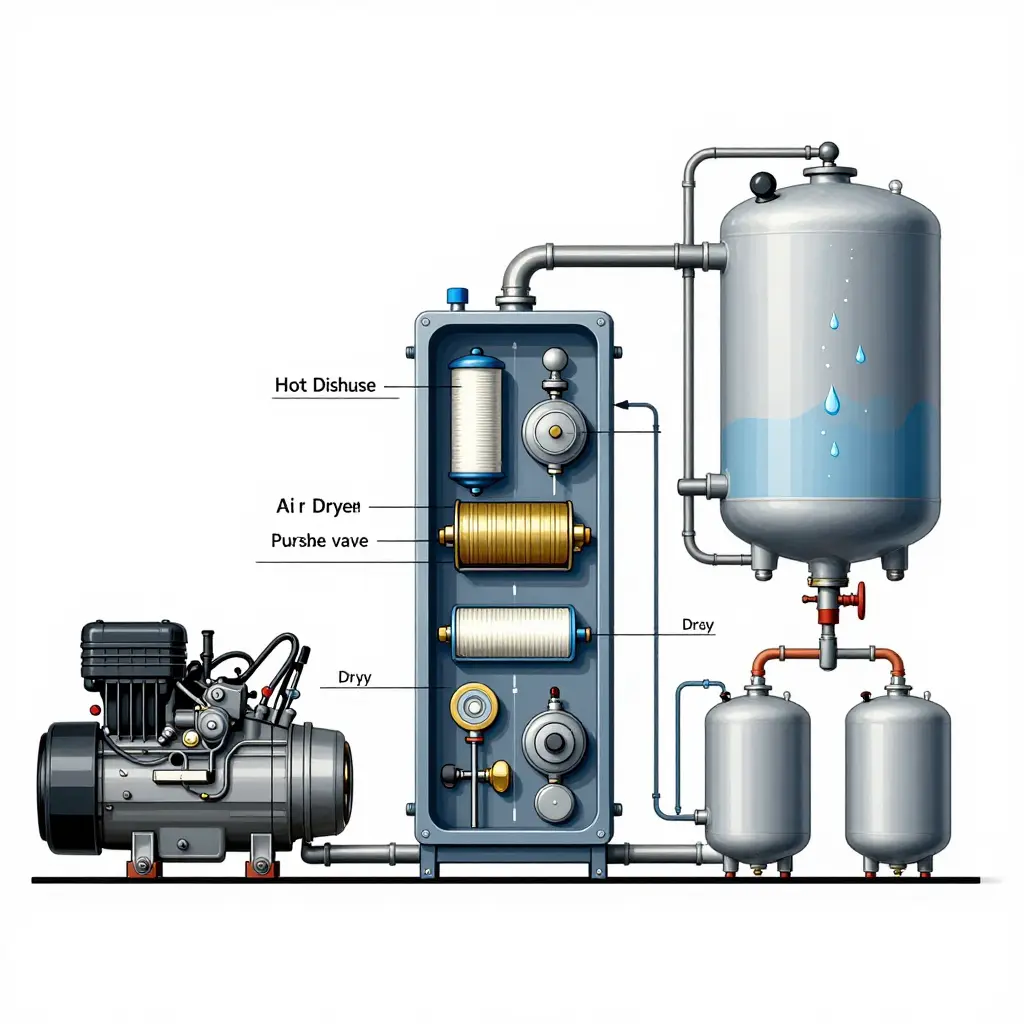
Air enters at the engine-driven reciprocating compressor. Compression concentrates whatever vapor the atmosphere held: draw in air at 60 percent relative humidity and the compressor delivers it fully saturated and running 200-300 degrees F. The discharge line carries that hot, wet charge through the aftercooler and past the governor and unloader on its way to the dryer.
Inside the Air Dryer
The dryer is the only active moisture barrier in the system, and it works only when four parts do their jobs:
- Desiccant cartridge – beads adsorb vapor from the passing charge and hold it until regeneration.
- Purge valve – at the end of each charge cycle it snaps open and dumps a burst of stored dry air, carrying released moisture overboard.
- Heater – keeps the purge valve and sump above freezing so condensate cannot lock the drain shut.
- Check valve – stops downstream reservoir air from backflowing through the dryer during purge.
All four fail quietly when the dryer never reaches purge pressure or operating temperature.
The Wet Tank
The wet tank is the supply reservoir, mounted immediately downstream of the dryer and first in line on the vehicle. That position is deliberate. It is the first vessel the dried charge enters and the first place air can shed whatever moisture got past the cartridge. Treat it as a settling chamber: velocity drops, the charge cools against steel, vapor condenses on the internal walls and runs to the low point, where the manual drain valve waits. Past it, the primary and secondary reservoirs feed the brake circuits and accessory tanks. They stay drier because the wet tank has already knocked the moisture down, until the wet tank itself begins passing vapor forward.
The Path of Water Vapor
Humidity enters at the compressor, rides as vapor through the hot discharge line, partly condenses in the aftercooler, and is adsorbed by the desiccant on its way through the dryer. The purge ejects what the beads release. Whatever settles in the wet tank is the load the dryer could not carry away. Humid standby loads every stage at once: overnight cooling and day-night temperature swings pull vapor out of suspension inside the wet tank, while repeated short runs that never build purge pressure leave the desiccant saturated, so the next charge simply pushes moisture into the first reservoir.
What Technicians Should Check First
Open the wet tank drain before anything else. Clear water points to a saturated cartridge, a stuck purge valve, or a failed heater, not to a faulty tank. Water found in a dry tank means the wet tank is already passing the problem downstream and the dryer has stopped doing its job.
Mapping Moisture Symptoms to Root Causes
Drain the wet tank first. If liquid is genuinely there, match what you see to the failure modes that produce it. The table pairs the symptoms reported most often on ARFF crash tenders with their likely root causes and the fastest check to run first.
| Observed Symptom | Most Likely Root Cause | First Diagnostic Check |
|---|---|---|
| Water only after humid standby | Desiccant saturated during idle with no regeneration | Check purge valve operation during unloaded cycles |
| Water after every shift | Failed purge valve or blocked exhaust port | Verify purge valve opens and drains fully |
| Oily emulsion in wet tank | Compressor passing oil past worn rings | Inspect compressor discharge for oil carryover |
| Intermittent purge | Sticking governor or sluggish purge valve | Monitor governor signal and purge timing |
| Constant moisture with new cartridge | Contaminated desiccant bed or inlet air leak | Confirm cartridge seated and inlet sealed |
| Sludgy discharge | Oil and water mixing; degraded desiccant | Sample discharge and inspect cartridge condition |
Treat the grid as a hypothesis, not a verdict. One symptom can have several contributors, and confirming one row often exposes a second fault behind it. Work the checks in order and log what you find.
Diagnostic Inspection Sequence: Tracing Water in the Wet Tank
Tracing Moisture in an ARFF Air Dryer System
Work this sequence when a crash tender develops water in the wet tank after a humid standby period. Each step isolates one possible moisture source, so the cause gets confirmed instead of guessed at with replacement parts.
-
Park the tender on level ground, chock the wheels, and let the air system stabilize for 15-20 minutes. Gravity separation concentrates any liquid water at the tank bottom, improving the accuracy of the drain sample.
-
Depressurize the air system slowly through the normal service brakes until the reservoir gauge reads zero. A controlled release protects you from stored-energy hazards and shows whether pressure holds or bleeds off.
-
Drain the wet tank into a clear container and examine the fluid for separation, emulsion, or rust tint. A heavy water slug that appears immediately confirms bulk carryover, while a milky mix points to oil contamination feeding the dryer.
-
Test the purge valve by watching for a strong, audible exhaust at the end of each governor cycle. A weak or absent purge leaves separated moisture trapped in the desiccant bed, so it re-enters the wet tank on the next charge.
-
Inspect the desiccant for color change, caking, or channeling through the cartridge window. Saturated or fractured beads cannot adsorb vapor, and channeled flow lets humid air pass straight through to the downstream reservoir.
-
Measure the heater circuit with a multimeter at the connector and check for voltage at the relay during key-on. An open heater element lets condensed water freeze in cold-weather standby, cracking the desiccant and dumping slurry into the wet tank.
-
Verify check valve integrity between the dryer and the wet tank by pressurizing and listening for backflow. A sticking check valve traps purge moisture upstream instead of routing it away, gradually refilling the tank.
-
Review the compressor duty cycle using the governor cut-in and cut-out readings and cycle timing. A compressor running hot and continuously produces excess condensate that overwhelms even a properly sized dryer.
-
Trace the air line routing from compressor to dryer, checking for low points, kinked sections, or a missing slope toward the dryer. Improper routing creates collection pockets where water pools and later migrates into the wet tank.
-
Record all findings, including drain volume, purge timing, heater resistance, and cut-in/cut-out values, in the vehicle maintenance log. Baseline data lets the next technician spot trends such as rising moisture before they shorten brake valve life.
Working from tank to compressor separates a failed dryer component from a routing or duty-cycle fault. Documenting each step on airport crash tenders keeps humid-standby moisture issues from recurring across the fleet.
Where the Water Actually Comes From: Frequency of Root Causes
Water in the wet tank after humid standby rarely comes from a single part. In the fleet maintenance records we work with, six faults account for the bulk of moisture complaints. The doughnut chart ranks them by how often each turns out to be the true source once a full diagnostic is completed.
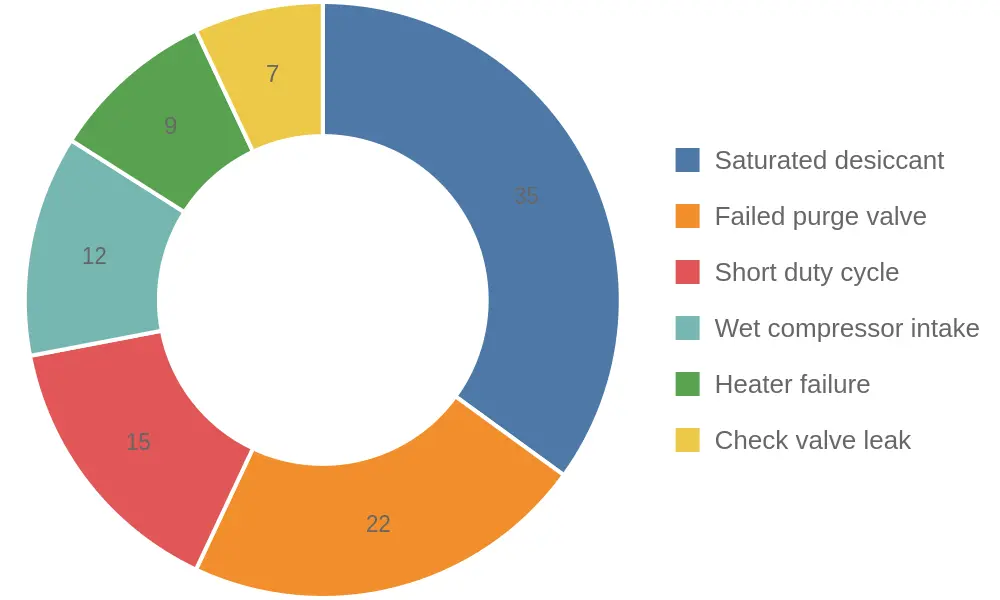
Figure: Relative frequency of root causes for moisture in the wet tank following humid standby. Percentages reflect the share of diagnosed cases attributed to each fault; a single truck can carry more than one contributor, so read them as diagnostic priorities.
Dominant segment: Saturated desiccant is the most common single cause at roughly 35 percent of cases. Whenever a truck has been resting in warm, damp air without a working regeneration cycle, inspect the desiccant bed first. A charge already loaded with moisture cannot dry the air that reaches the wet tank, so every component downstream inherits the problem.
The remaining causes share a theme: the dryer never truly getting hot, purged, or fed with dry air. A failed purge valve (22 percent) leaves captured moisture parked in the system. A short duty cycle (15 percent) and a wet compressor intake (12 percent) both starve the dryer of the heat and low-humidity air it needs to regenerate. Heater failure (9 percent) and check valve leak (7 percent) are less frequent but no less damaging: a stuck-open check valve back-feeds wet air from the wet tank straight into the dryer the moment the compressor cycles off.
Reading the Chart in the Bay
Work the segments in order of frequency rather than chasing the least likely fault first. Check desiccant condition and regeneration heat, confirm purge valve operation, then confirm the compressor is actually reaching duty temperature long enough to purge. That order resolves the majority of wet-tank moisture findings without unnecessary parts swapping.
Desiccant Saturation and Regeneration
Inside an airport crash tender air dryer, the desiccant bed (typically activated alumina or silica gel) adsorbs water vapor as compressed air passes through it. Moisture clings to the porous beads, drying the charge before it reaches the wet tank and brake circuit.
Without a full purge cycle, the desiccant never releases the water it captured, so saturation builds out of sight.
Regeneration happens during the purge cycle. When the governor signals the compressor unloaded, a burst of dry air flows backward through the desiccant, sweeping adsorbed moisture out through the purge valve. Purge volume ties directly to duty cycle: a system that runs often produces enough to refresh the bed.
Humid standby breaks that balance. During long idle periods in damp air, the compressor cycles briefly and infrequently, so purge volume falls short of what full regeneration requires. Residual moisture then migrates downstream into the wet tank.
The relationship is proportional: shorter duty cycles and smaller purge volumes leave higher residual moisture. Oil-fouled or contaminated desiccant loses capacity faster, widening the gap. Technicians tracing wet-tank water should log compressor run time and purge volume together. The water that accumulates is the sign of under-regeneration.
Airflow Path: Following Moisture From Compressor to Tank
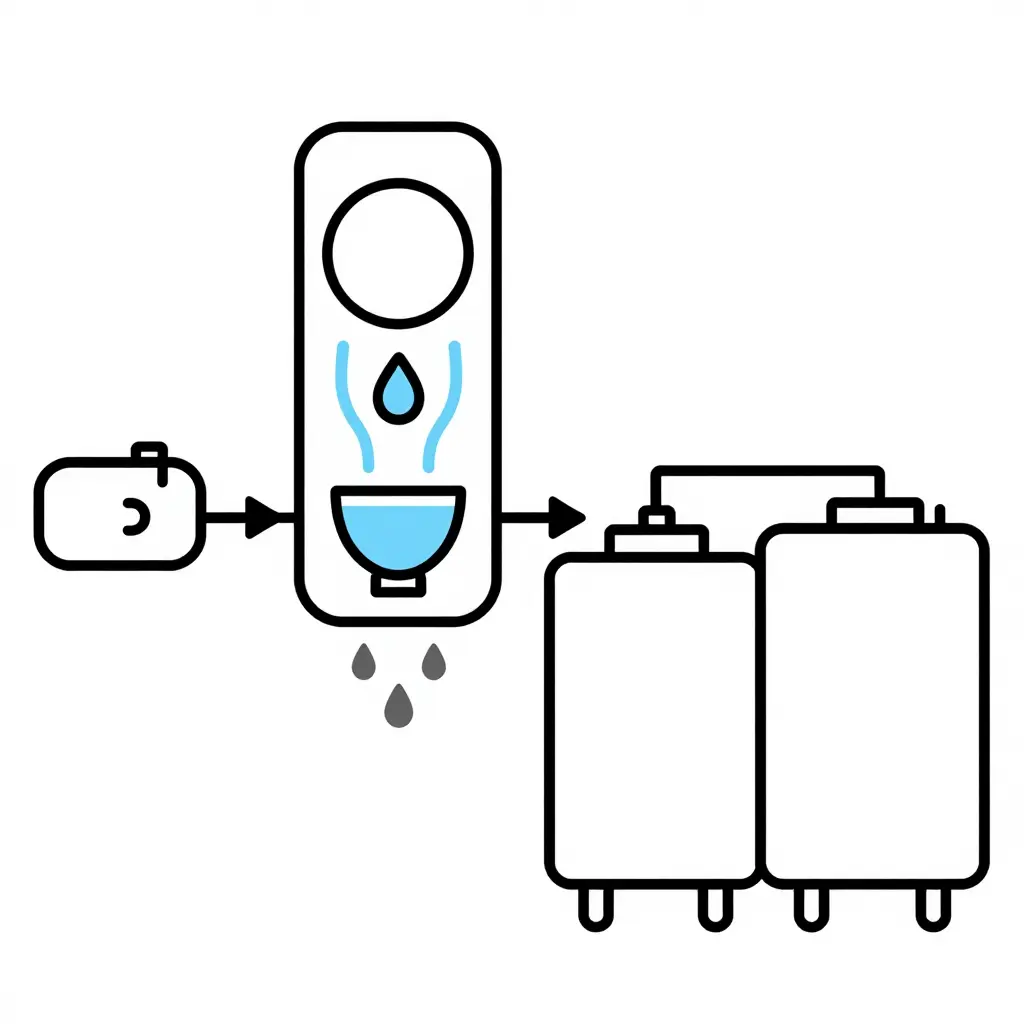
The schematic below traces airflow from the compressor, through the air dryer, and on to the wet tank and dry tanks. Directional arrows show the sequence; the gray droplets mark the points where moisture separates and collects. Read it before you open a drain: on an ARFF rig that has been sitting in humid standby, the water you eventually find in the wet tank began as vapor compressed at the pump and should have been stripped out somewhere along this route.
Reading the Diagram Like a Diagnostician
Walk the flow from left to right. At each junction, water is either removed or it gets past into the rest of the system:
| Stage | What the air is doing | Where water should go | Red flag if it does not |
|---|---|---|---|
| Compressor | Compresses ambient air, heating it and driving vapor into the discharge line | Nothing yet – vapor stays suspended | Excess oil carryover pushing liquid downstream |
| Air dryer | Cools and passes air across the desiccant cartridge | Vapor condenses and drops into the bowl | Wet bowl, saturated desiccant, or purge valve never firing |
| Wet tank | Receives air first and gives remaining droplets a place to settle | Liquid collects at the tank base | Standing water above the normal condensate film |
| Dry tanks | Store the air that feeds the brake circuits | Should receive essentially dry air | Moisture traces here mean the dryer is failing upstream |
The wet tank is not the fault in this arrangement. It is the designed collection point. The problem on a humid-standby crash tender is rarely that water reached the tank at all; it is that too much arrives, arrives faster than the dryer can reject it, or never leaves because the drain is not doing its job. The same stage-by-stage habit helps when other systems on the vehicle misbehave, such as tracking why a crash tender’s foam proportioning drifts on the ramp.
Where Technicians Get Misled
- Blaming the dryer first. A wet wet-tank does not automatically mean a dead cartridge; a sticking drain or a missing purge cycle produces the same symptom.
- Ignoring duty cycle. Short, frequent engine starts during standby build moisture with little opportunity to purge, quietly overworking the desiccant.
- Skipping the tanks. Pull the wet-tank manual drain and check the volume, not just the presence, of liquid – a teaspoon is normal, a steady stream is not.
Work the path from source to storage every time, and the diagram becomes your troubleshooting sequence.
Purge Valve, Drain Valve, and Reservoir Check Diagnostics
When water keeps pooling in the wet tank after humid standby, the desiccant cartridge is only one suspect. The hardware that actually expels moisture deserves the same scrutiny, because a slow or silent component pushes condensing air brake moisture straight back into the reservoir.
- Purge valve: Check the seat for seal wear and carbon scoring. Time the audible blast at governor cut-out; a weak, short, or missing blast means air is carrying through instead of venting. Confirm with a purge-volume test at operating pressure.
- Automatic drain valves: Icing and debris block the orifice, so the valve stops spitting condensate. Pressurize and watch for a timed release; frozen or silted units stay silent and dump water into the wet tank.
- Manual wet tank drain: Pull it daily during humid standby. If nothing ejects but the reservoir is wet, the drain line is clogged.
- Reservoir check valves: A leaking check valve back-feeds moisture-laden air. Verify with a pressure-hold test at each reservoir; any bleed-down points to a bad seat.
Correct governor cut-out is the baseline; a setting that is too low shortens the purge cycle and lets water back in to the wet tank.
FAQ: Tracing Water in the Wet Tank After Humid Standby
How much water in the wet tank is normal?
A small amount of condensate is expected, because the wet tank is intentionally the first collection and settling point in a heavy-vehicle air brake system. If you drain roughly 10 to 30 mL (about one to two tablespoons) of clear liquid after a long humid standby and the tank stays dry for the rest of the shift, the system is behaving normally. The trouble sign is recurrence: water that refills the tank within one or two operating cycles, or a volume exceeding about 250 mL per drain, means the air is no longer being dried effectively. At that point, treat the accumulation as a fault, not a maintenance nuisance.
Why does moisture appear only after humid standby?
That delayed pattern points to a desiccant that is saturated or only marginally regenerating. During humid standby, ambient air enters the system through the compressor’s intake and past valve seats, and the bed absorbs that vapor while the vehicle sits with no purge cycles to shed it. Once the truck starts cycling pressure, the bed releases the trapped moisture into the lines, where it condenses in the cooler wet tank. Condensation that clears on dry days but returns on humid mornings usually means the drying element is at the end of its life, not that something is mechanically broken.
Should the desiccant cartridge be replaced on a schedule or on condition?
Run condition-based replacement with a firm calendar backstop, because schedules alone miss heavily loaded dryers while condition alone lets neglected units run too long. Evaluate the cartridge by checking purge exhaust behavior, moisture at the wet tank drain, and pressure-dew-point indicators where fitted, then replace when readings degrade. The pragmatic rule for ARFF fleets is to hard-stop the element at the manufacturer’s maximum interval regardless of readings, since standby-heavy duty cycles age desiccant unpredictably. Document every change so trend data, not guesswork, drives the next decision.
Can a faulty purge valve alone cause water buildup?
Yes. The purge valve drives the regeneration cycle: it dumps collected water and drives the reverse airflow that dries the desiccant bed. A valve that sticks closed, leaks past its seat, or fails to open fully stops that regeneration, so the cartridge never recovers and moisture carries straight through to the wet tank. Before condemning the desiccant, verify the purge valve opens on the pressure-cycle event, seals fully afterward, and is not iced or fouled.
How do I differentiate condensation from compressor oil carryover?
Condensation is clear, watery, and essentially odorless, and it separates cleanly from the tank wall. Oil carryover is dark or milky, feels slick between your fingers, often shows a rainbow sheen, and can form a sludge that clings to the tank instead of draining freely. If you find an emulsion that will not separate, suspect a worn compressor passing oil, a failed discharge-line filter, or a contaminated desiccant, and trace upstream rather than simply draining more often.
How should maintenance intervals change in humid climates?
Shorten them deliberately. In persistently humid or coastal environments, inspect the desiccant and purge cycle more frequently, drain the wet tank daily before the first run, and shorten the cartridge replacement backstop to match the added vapor load. Higher ambient humidity means the dryer does more work per hour and reaches saturation faster, so intervals built for dry climates will leave moisture unchecked. Reassess your schedule seasonally rather than yearly, and let wet-tank drain results confirm whether the new interval is actually holding.
Prevention and Maintenance Cadence
Moisture rarely appears overnight; it accumulates through inconsistent servicing. Set a cadence and hold it.
Drain and inspection. Open wet-tank and reservoir drain cocks daily during humid standby, and inspect for free water weekly. If water returns within 24 hours of a full drain, the desiccant is spent.
Desiccant replacement. Replace cartridges at the manufacturer interval, but shorten it in coastal or high-humidity service. Treat downstream carryover, oil sheen, or a dewpoint climbing above spec as an immediate replacement trigger.
Purge valve service. Inspect purge valves every 90 days and rebuild annually, or sooner if cycle times drift. A sluggish purge leaves moisture trapped in the canister.
Heater function checks. In humid or cold-humid climates, verify heater continuity and thermostat operation monthly. A failed heater freezes the purge valve and blocks regeneration.
Duty-cycle awareness. Standby with long idle periods starves the dryer of regeneration cycles, so log run hours rather than calendar days. Apply the same fleet-wide diagnostic discipline you use for foam proportioning, and remember that temperature swings and humid conditions degrade vehicle subsystems well beyond the air brake circuit.
Water in the wet tank after humid standby rarely has a single cause. The evidence points to a chain: saturated desiccant that can no longer absorb moisture, a purge valve that fails to expel it, a duty cycle too short for the dryer to regenerate, and finally hardware faults such as leaks or a worn compressor. Each link has to be traced in sequence. Replacing parts before the upstream cause is confirmed simply reintroduces water into the system.
Following that order – desiccant, purge, duty cycle, hardware – turns a vague complaint into a repeatable diagnostic routine. For any airport crash tender air dryer, disciplined inspection is what keeps moisture out of the wet tank.
The same discipline is what keeps an ARFF fleet ready to roll.