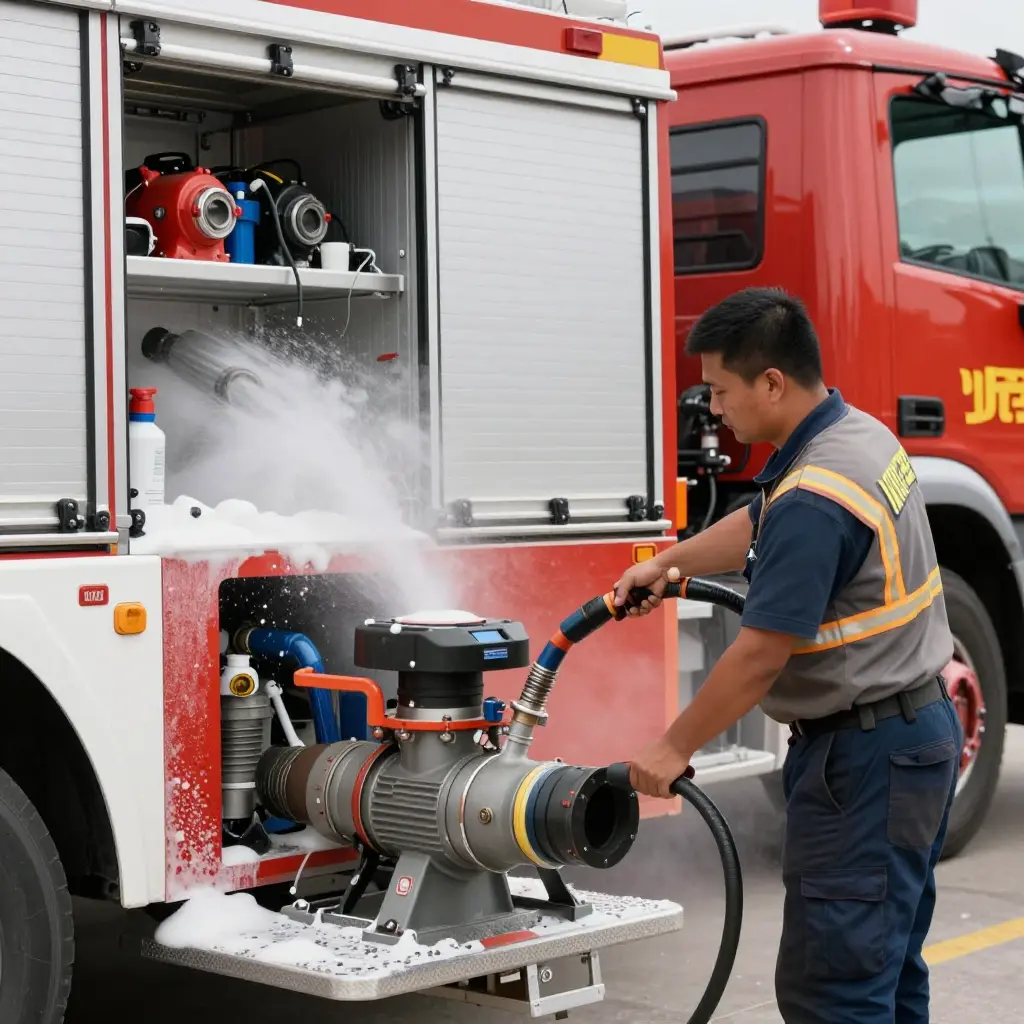
How Foam Pump Priming Actually Works
Priming displaces air from the pump casing and suction line so that atmospheric pressure can push liquid into the pump inlet. A centrifugal fire pump cannot move air efficiently on its own; it needs liquid at the impeller before it can generate pressure. During priming, the pump or its priming system creates a partial vacuum inside the casing. Atmospheric pressure, acting on the surface of the water or foam concentrate supply, then forces liquid up the suction hose and into the pump inlet.
The vacuum is generated by a positive-displacement priming pump, a venturi or eductor driven by compressed air or exhaust, or a dedicated vacuum pump. Whichever type is fitted, its job is narrow: evacuate air fast enough that the suction line fills with liquid before the vacuum decays. Air that stays entrained in the stream often surfaces downstream as foam proportioning drift, which is why a weak prime is rarely just a pump problem.
Three physical conditions required to establish and hold prime
- An airtight suction path. Every coupling, gasket, valve packing, and hose connection must hold vacuum. Any air leak admits air faster than the priming device can remove it.
- Adequate net positive suction head (NPSH). The liquid supply must deliver enough pressure above its vapor pressure to keep the impeller flooded and prevent cavitation.
- Unobstructed flow. A collapsed hose, blocked strainer, closed valve, or kinked line restricts the liquid’s path and prevents the casing from filling.
Suction lift versus flooded inlet
When the pump draws from a source below the impeller – a condition known as suction lift – it must pull enough vacuum to raise liquid against gravity plus friction losses. Losing prime here is common and highly sensitive to the smallest leak. When the inlet is flooded, liquid arrives under positive pressure and gravity assistance, so priming is easier and more forgiving. The distinction matters during diagnosis: a suction-lift installation exposes minor leaks and NPSH shortfalls that a flooded inlet would simply mask.
Reading the Suction Side: A Component-by-Component Map
Before you loosen a clamp on a crash tender that keeps losing prime, build a mental picture of the suction path. Foam concentrate is pulled, not pushed, from the tank to the pump, so any break in that chain lets air in and collapses the vacuum the pump needs to lift the agent. The schematic below traces that path from the tank to the pump inlet, and it is the order to follow once you start looking for the fault.

Walking the Diagram
Follow the flow arrows from left to right:
- Foam concentrate tank outlet – where agent leaves the tank. A sagging or partly submerged outlet can draw air once the tank level drops.
- Suction strainer – the first protective element. A clogged or partly blocked strainer starves the pump and mimics a prime loss.
- Suction hose / pipe – the main run carrying concentrate to the pump. Check for soft spots, kinks, and walls that collapse under vacuum.
- Inlet valve – the manual or pneumatic isolation valve. One that is only partly open, or a damaged seat, restricts flow and traps air.
- Highlighted connection rings – these bright rings mark the air-leak-prone joints: flange faces, threaded unions, and hose clamps. They are the most common source of the air ingress that kills prime.
- Priming pump connection point – the tee branching off the suction line. A leaking seal or non-return valve here bleeds off the vacuum the priming system relies on.
- Pump inlet – where concentrate finally enters the pump casing. A worn inlet gasket or cracked inlet flange completes the list of usual suspects.
Why the Order Matters
Technicians naturally gravitate to the pump itself or the priming pump when prime is lost, but the schematic shows why the suction side deserves the first look. Because the system operates under negative pressure, air is sucked through the weakest point rather than leaking visibly outward, which is why these faults often go unnoticed during routine checks. Start at the tank and work methodically toward the pump, finishing at the highlighted connection rings; that way you isolate a single bad joint instead of chasing symptoms through the whole circuit.
Keep this map in mind the next time a rig drops prime on the apron: trace the flow, check each ring and clamp in sequence, and treat anything that lets air into the line as the primary suspect before you pull the pump.
Pre-Inspection Safety and Preparation
Before you open a suction-side fitting, shut down the crash tender and bring the foam system to a safe, zero-energy state. Close the tank-to-pump and discharge isolation valves, then depressurize every trapped line through its designated bleed points. Do not assume a line is dead because the pump is off. Residual pressure can linger in the discharge manifold and the foam proportioning loop long after shutdown.
Isolate the pump driver first. Apply lockout/tagout to the engine start, PTO, or electric drive; remove and retain the key; and confirm zero rotation at the pump shaft. Attach your personal tag so that no operator can re-energize the pump while you work. Do not begin suction-side diagnostics until this step is verified.
DANGER: Never break a suction flange on a pressurized or un-isolated foam system. Depressurize, then verify.
Confirm concentrate type and compatibility before introducing any test fluid. Match the agent to the system’s specified concentrate, and account for how storage conditions affect its chemistry – see how temperature swings shorten foam concentrate shelf life before you trust what is in the tank.
Check your PPE for concentrate exposure: chemical splash goggles, gloves, and an apron rated for the specified agent, with a rinse source within arm’s reach.
CAUTION: Many concentrates are skin and eye irritants even when dilute. Treat every decant and sample as a potential exposure.
Finally, review the vehicle’s foam system schematic and its prior maintenance log. Trace the full suction path, note every valve, strainer, and inlet, and flag any recurring prime-loss, seal, or proportioning entries.
Suction-Side Diagnostic Procedure: Isolating Foam Pump Prime Loss on ARFF Crash Tenders
When an airport crash tender reports a foam pump losing prime, the root cause is almost always hiding on the suction side, long before the proportioning system deserves any blame. Air ingress, a clogged strainer, or a partly open valve will starve the pump far faster than any internal wear issue ever will. Work this sequence in order, one check at a time, and record each result so the same fault does not resurface on the next shift.

Step-by-Step Suction-Side Diagnostic Sequence
-
Confirm the pump is genuinely losing prime, not suffering a control or discharge-valve fault. Run the pump per the operating manual and watch suction vacuum and discharge pressure together. If both hold while the controller reads no prime, the fault is electronic or a closed discharge valve, not the suction side.
-
Inspect the suction strainer and tank outlet for blockage. Remove and back-flush the strainer, then look into the tank outlet for debris, sludged concentrate, or a stuck flapper. A restricted inlet mimics a prime loss and is the most common physical cause.
-
Check every suction-side joint, gasket, and hose coupling for air ingress. A vacuum-tight suction line is everything. A weeping gasket or loose coupling admits air that breaks prime under load even when the pump itself looks healthy.
-
Verify the suction valve is fully open. Confirm the handle position and, on air or electric actuators, the actual valve travel rather than just the indicator light. A valve cracked only partway throttles the pump into cavitation and a false prime loss.
-
Test the priming pump or vacuum system. Check that the priming circuit pulls and holds vacuum to specification. A weak priming pump will fail to recover prime once the suction column drains back after shutdown.
-
Check for a collapsed or delaminated suction hose. Flex the hose and inspect the inner liner. A hose that collapses under vacuum or has a separated liner chokes flow internally with no visible external damage.
-
Evaluate concentrate level and vortexing at the tank outlet. Keep the tank above the low-level mark and make sure no vortex is forming; a low level or swirl pulls air straight into the suction line. Review foam concentrate storage practices to keep the agent conditioned and the supply stable.
-
Re-test prime and log all findings. Restart the pump, confirm stable prime across the full flow range, and document every check, reading, and correction so the next technician starts from evidence rather than guesswork.
Why Sequence Matters
Isolating a foam pump losing prime is a process of elimination, and the suction side should always be cleared first because it is the cheapest and most likely place to find the defect. Work top to bottom, change one variable at a time, and you will restore reliable priming without disturbing the proportioning system unnecessarily.
Use this matrix as a quick reference during suction-side diagnostics on a crash tender that has lost prime: identify the fault location, verify the likely root cause, and complete the first check action before escalating to full-system proportioning troubleshooting.
| Fault Location | Typical Symptom | Likely Root Cause | First Check Action | Severity |
|---|---|---|---|---|
| Clogged suction strainer | Prime drops at high RPM; gauge flickers; pump cavitates | Debris/sediment blocking strainer mesh | Isolate suction, pull strainer, inspect and flush | High |
| Air leak at suction coupling | Erratic prime; visible bubbles; whining pump | Loose or damaged coupling; low clamp torque | Pressure/soap test coupling; re-torque clamps | High |
| Worn gasket / seal | Gradual prime loss; weeping at flange; air ingress | Hardened, nicked, or compressed elastomer seal | Inspect seal face; replace gasket | Medium |
| Closed or partially closed suction valve | No prime from cold start; low suction vacuum | Valve left shut or actuator not fully open | Verify valve position/indicator; open fully | Critical |
| Faulty priming pump / venturi | Pump fails to pull prime; no venturi vacuum | Worn venturi, clogged jet, or failed drive | Test venturi vacuum and prime pump output | High |
| Collapsed suction hose lining | Prime holds static; collapses under flow | Delaminated inner liner from age/chemical attack | Inspect and feel hose for soft spots; flow test | High |
| Low concentrate level with vortexing | Air entrainment; erratic proportioning; prime loss | Tank level near suction outlet; vortex forming | Check level vs. outlet; top up or fit anti-vortex plate | Medium |
| Cracked suction pipe weld | Intermittent air ingress; vacuum leak; wet streak | Fatigue crack at weld toe or heat-affected zone | Dye-penetrant and visual weld inspect; vacuum test | Critical |
Fault-by-Fault Explanation: Common Suction-Side Causes of Foam Pump Prime Loss
When an ARFF crash tender loses foam pump prime on the ramp, the fault almost always lives on the suction side. The discharge side can mask the symptom, but prime loss traces back to a break in the liquid seal between the concentrate tank and the pump inlet. The six causes below give the diagnostic clue and the corrective action for each, and each maps to a row in the fault matrix above.
Air Entrainment Through Loose Couplings and Hardened Gaskets
A suction line is only as sealed as its weakest joint, and air entering at a loose coupling or a hardened gasket will starve the impeller before liquid reaches it. Inspect every cam-lock, flange, and threaded connection between tank outlet and pump inlet, then coat each joint with soapy water and watch for bubbles as the pump draws. Gaskets that are flattened, cracked, or glazed have lost their compression set and leak under the negative pressure of suction lift. Reseat or replace each suspect gasket, torque couplings to spec, and retest; if prime returns immediately, air ingress at a joint was the fault.
Restricted Flow From a Fouled Suction Strainer or Tank Screen
A partly blocked strainer behaves like a failing pump, so rule it out before condemning hardware. Pull the suction strainer and the tank screen and look for concentrate residue, polymer gel, or mineral scale bridging the mesh. A restricted screen drops inlet pressure just enough that the pump will not hold prime at low concentrate levels but seems fine when the tank is full, which the fault matrix flags as “prime at full tank, loss as level drops.” Clean or replace the strainer and screen, flush the line, and confirm prime holds across the full operating range.
Suction Valve Not Fully Open
A throttled suction valve is the simplest cause and the most often overlooked. Verify the tank-to-pump suction valve is fully open, not cracked or partly seated. A valve left half-open, backed off by vibration, or hung up by a bent stem creates a high suction lift condition that mimics air ingress; the clue is a handle that stops short of its full-travel stop or a stem that will not seat flush. Cycle the valve fully open, exercise it several times to clear any binding, and lock it in the open position before the next run.
Priming Pump or Venturi Failure
The priming circuit exists to pull the first charge, and when it fails, prime loss is total rather than partial. Test the priming pump or venturi separately from the main foam pump. Listen for weak airflow and check for a clogged venturi throat, worn priming vanes, or a leaking primer seal. The fault matrix ties this to “no prime at any level” with normal suction components. Rebuild or replace the priming pump, clear the venturi jet, and confirm the system pulls and holds prime before returning the truck to service.
Suction Hose Lining Collapse or Delamination
A hose can look perfect on the outside while its internal lining collapses under vacuum and chokes flow. Examine the suction hose for soft spots, a flattened section, or a separated liner that flaps shut under suction lift. Run your hand along the hose while the pump draws; a collapsing lining shows up as a sudden dimple or a restriction that appears only under vacuum. Replace any hose with a collapsed or delaminated lining, since internal damage cannot be repaired, and retest prime.
Low Concentrate Level Inducing Vortex Air Intake
When the tank level drops far enough, the outlet draws a vortex of air instead of liquid, and prime loss returns even though every component is sound. Confirm the outlet sits below the vortexing level and check the tank for a missing or damaged anti-vortex baffle or standpipe. The fault matrix links this to “prime loss that correlates with low tank level.” Aged or heat-cycled concentrate can also thicken and worsen the draw; understanding why temperature swings shorten agent shelf life helps you judge whether the agent itself is contributing. Keep concentrate above the vortex threshold, restore the anti-vortex device, and refill before the level reaches the draw-off danger zone.
Quick-Reference: Clue to Fix
| Cause | Diagnostic Clue | Corrective Action |
|---|---|---|
| Air entrainment | Bubbles at joint under soapy-water test | Replace gaskets, torque couplings |
| Fouled strainer/screen | Prime at full tank, lost as level falls | Clean or replace strainer and screen |
| Suction valve not open | Handle stops short of full travel | Cycle and lock valve fully open |
| Priming pump/venturi failure | No prime at any tank level | Rebuild priming pump, clear venturi |
| Hose lining collapse | Soft spot or dimple only under vacuum | Replace the suction hose |
| Low concentrate level | Prime loss tracks low tank level | Restore baffle, refill above threshold |
Suction-Side Fault Frequency: Where Prime Loss Usually Starts
It helps to know which suction-side faults actually rob a crash tender’s foam pump of its prime most often. The chart below ranks the seven most common culprits by illustrative relative incidence, so you can sequence your diagnostic checks by likelihood instead of guessing. Start your inspection at the highest-frequency items and work downward: an air leak at a coupling or gasket, then a clogged suction strainer, then a suction valve left partway open.
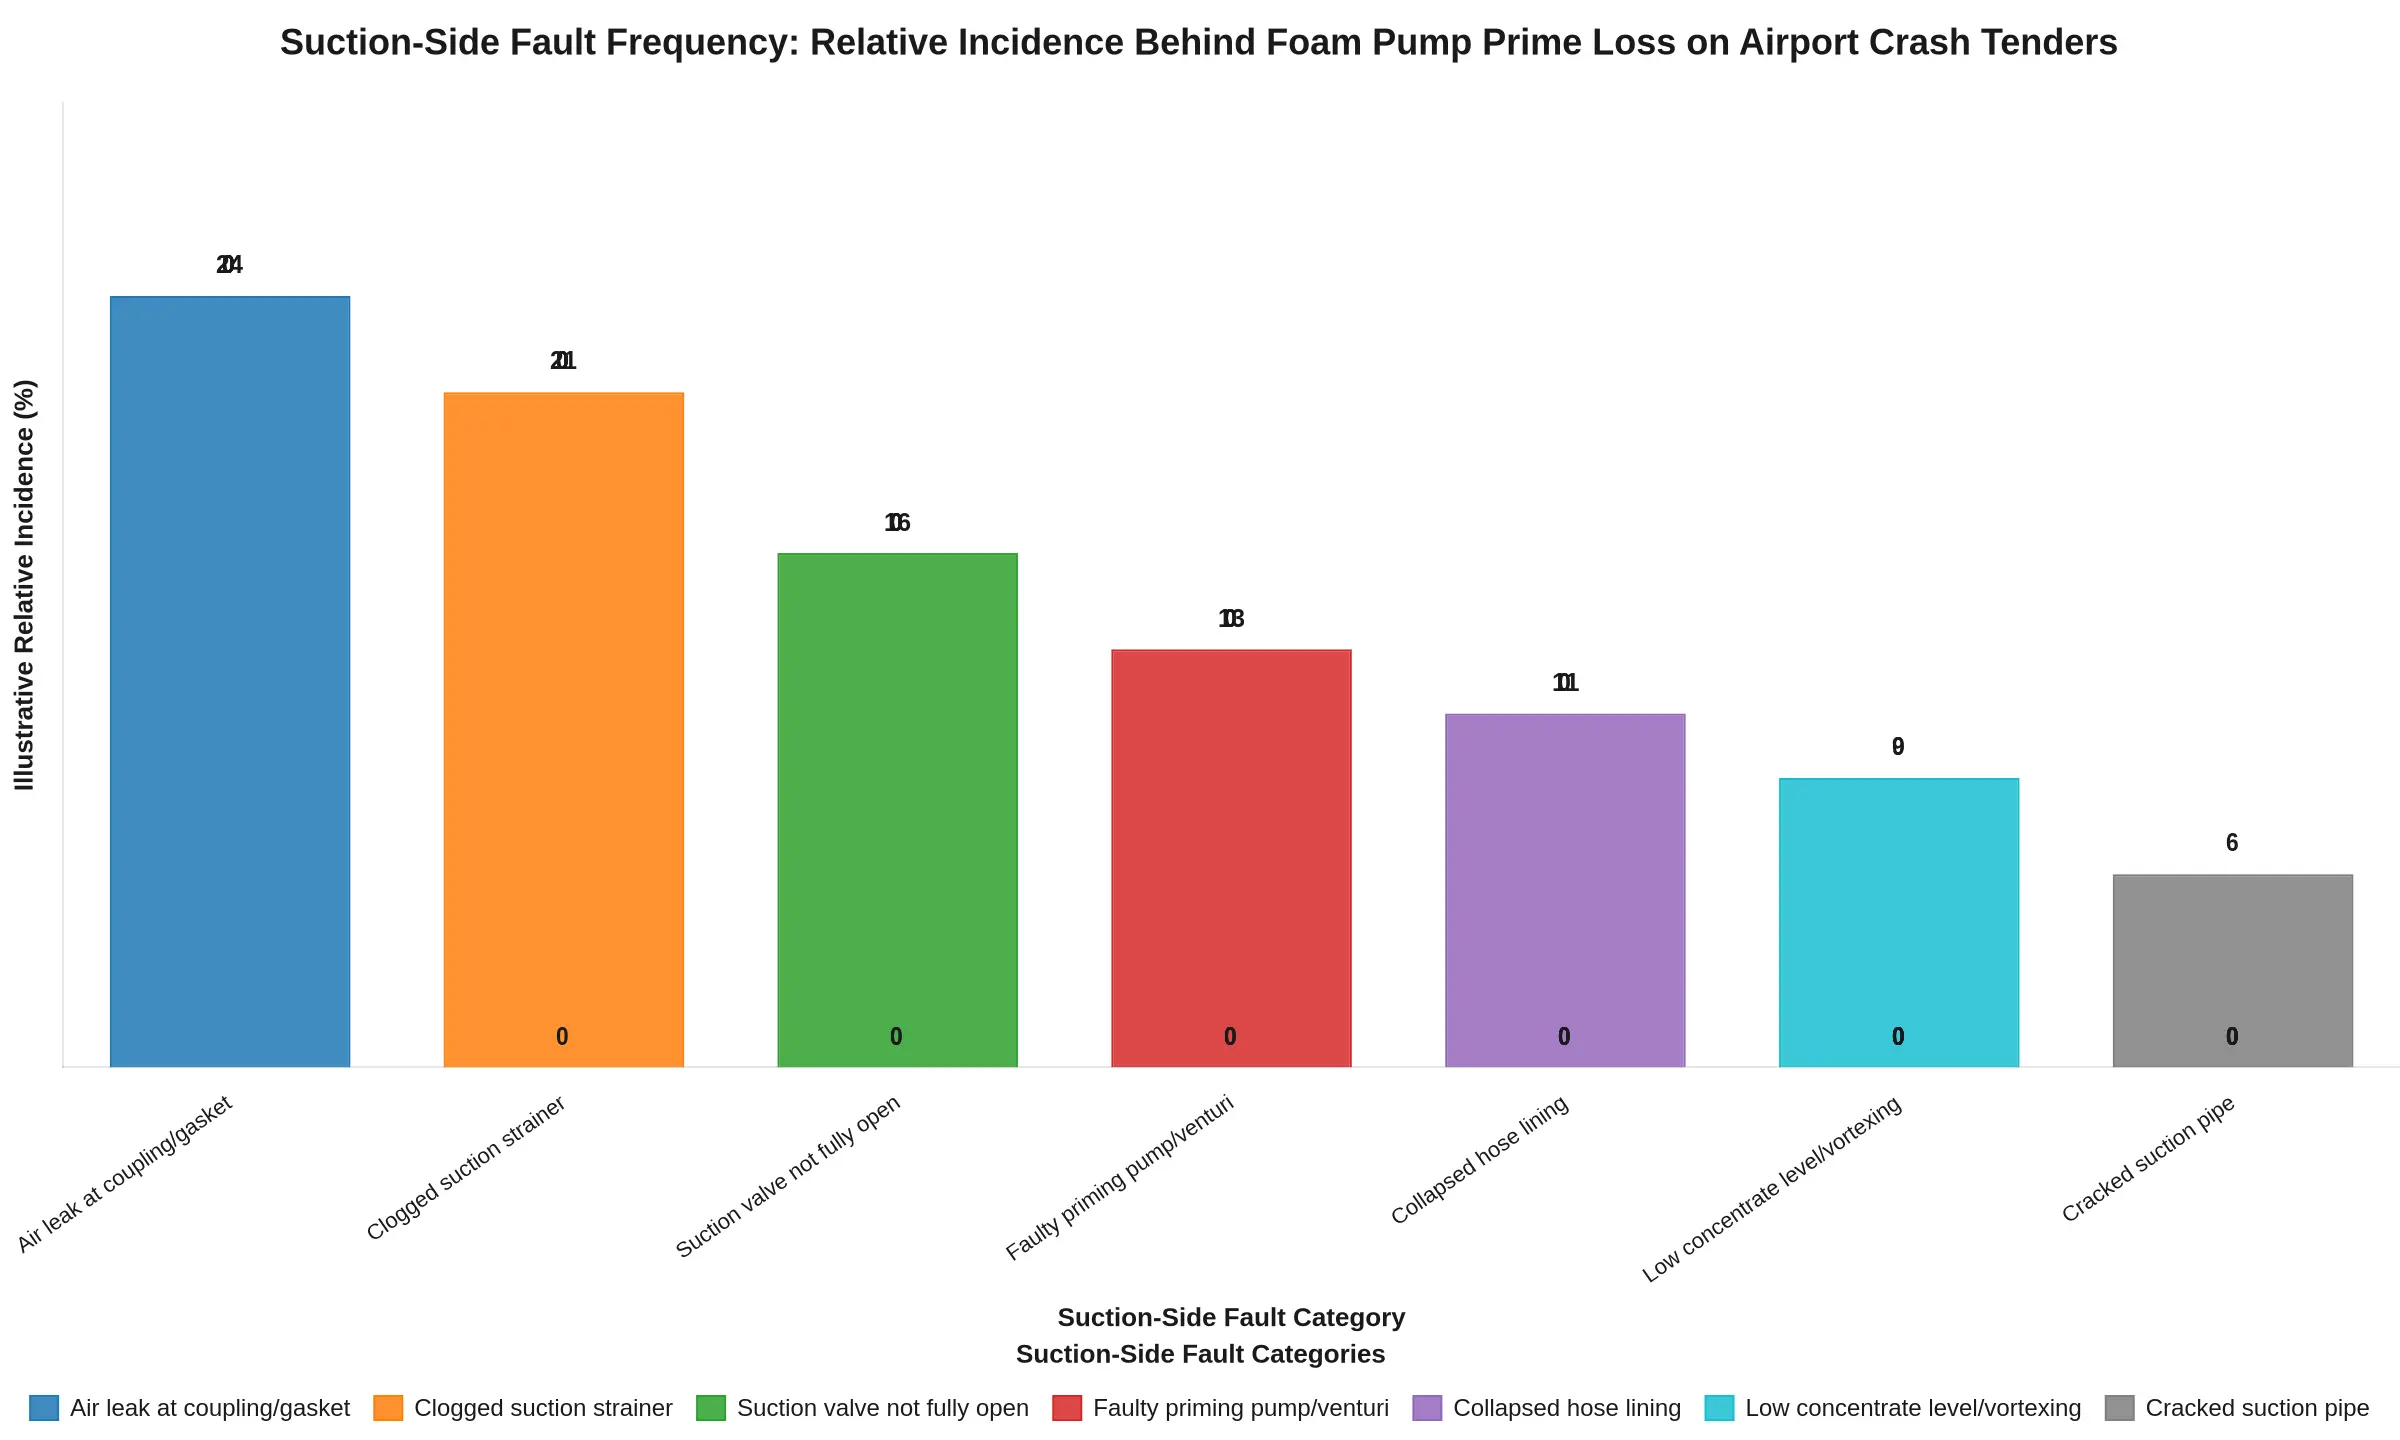
Treat these percentages as a prioritization aid only. They reflect typical field patterns, not your specific vehicle’s history, and they are no substitute for the OEM fault matrix or your own maintenance records. When a fault resists a quick fix, back your diagnosis with pressure and vacuum testing rather than relying on frequency alone.
Deep-Dive: Suction Hose, Strainer, and Coupling
On most crash tenders that lose prime, the fault lives on the suction side long before the pump itself is suspect. Lifting foam concentrate from a tank or draft source demands an airtight, unrestricted path, and one compromised hose, screen, or gasket breaks that path. Work the hardware below in sequence before condemning the pump.
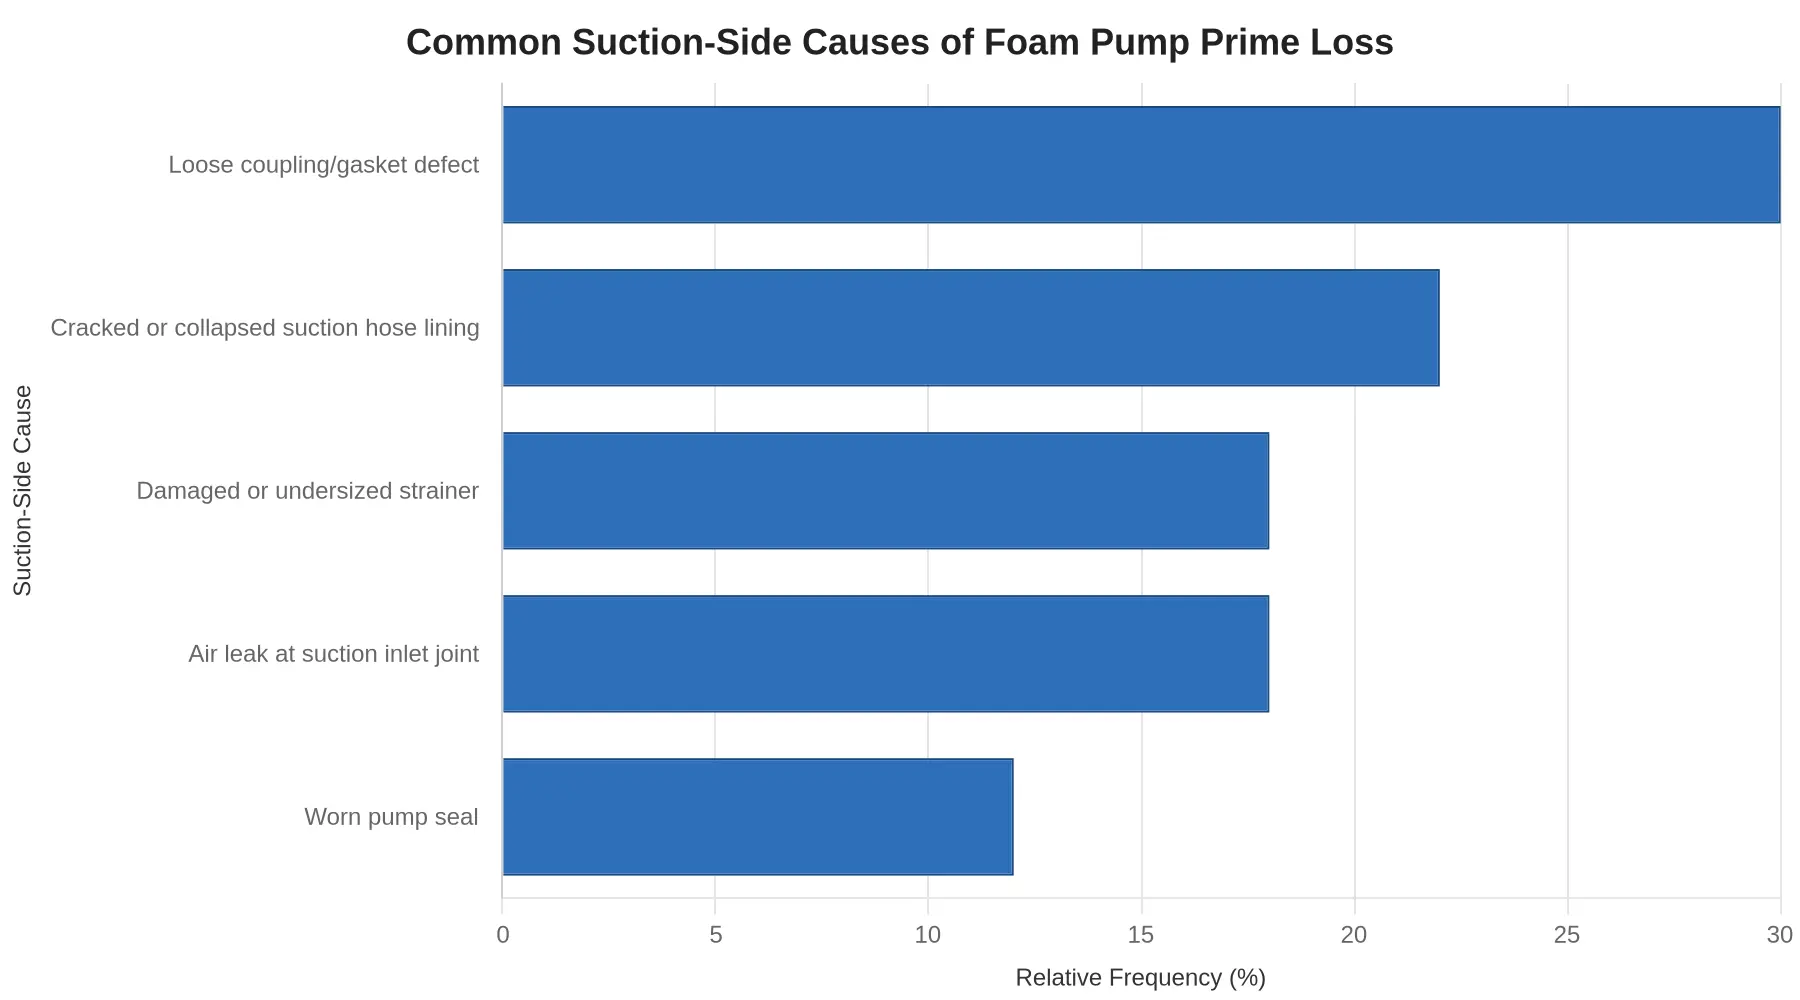
Inspecting the Suction Hose Internally
A hose can look perfect outside and still fail inside. Drain and disconnect it, then run a bright inspection light down the full bore. Look for two specific failure signatures:
- Lining collapse – the inner liner has flattened or wrinkled, narrowing the bore. Under vacuum the liner pinches further and starves the pump.
- Delamination – the liner has separated from the reinforcement carcass, forming a loose flap that swings shut as suction builds, mimicking a blocked strainer.
Flex each section by hand. A healthy suction hose stays round and springy; a failing one feels soft or crunchy. Replace, do not splice, any hose showing lining collapse or delamination.
Strainer Sizing and Cleaning for Foam Concentrate
Size the strainer to the hose bore and pump inlet, with mesh fine enough to trap debris yet open enough to pass foam concentrate without restriction. Undersized screens and mismatched mesh both create cavitation and lost prime.
Clean and rinse the screen after every foam operation; concentrate residue dries into a sticky film that blinds the mesh. On ARFF apparatus, inspect the strainer at least weekly and after any operation that stirred up tank sediment.
Coupling Torque and Gasket Condition
Reassemble couplings to the manufacturer’s torque figure with a calibrated wrench; hand-tight alone invites a slow air leak. Inspect every gasket for nicks, swelling, flattening, or hardening, and replace any that is deformed. A swollen or pinched gasket is one of the most common hidden air leak sources on the suction side.
Verifying a Leak-Free Path: The Vacuum Test

Confirm the whole line holds vacuum before returning the truck to service:
- Cap or plug the suction inlet and close any tank valve on the suction side.
- Fit a vacuum gauge to a test port on the suction line.
- Pull the line down to the manufacturer’s specified vacuum.
- Hold it and watch the gauge decay over the hold period.
- Brush soapy water over every coupling, gasket joint, and hose fitting – bubbles pinpoint an air leak.
Any gauge decay or bubbling joint means the path is not leak-free. Repair and repeat until it holds.
Acceptance Criteria
- Suction hose bore is fully round, with no lining collapse or delamination.
- Strainer is correctly sized, clean, and undamaged.
- Couplings are torqued to spec and gaskets are pliable and unmarked.
- Vacuum holds within specification with no measurable decay.
- No bubbles appear at any joint during the soapy-water check.
If the suction side passes every one of these checks and the pump still drifts, look downstream. Unnoticed foam proportioning drift often develops independently of prime.
Where to Go Next: Related Foam System Diagnostics
Once prime is restored and the suction side is holding vacuum under load, the troubleshooting work does not stop there. Two follow-on concerns deserve a closer look, and both are covered in detail elsewhere on this site.
Restoring prime solves the immediate pump-side fault, but it does not guarantee that the concentrate is being inducted in the correct ratio. If your rig delivers foam that looks thin, watery, or inconsistent after a prime recovery, the issue often sits in the proportioning hardware rather than the suction path. For a focused walkthrough of that failure mode, see our analysis of why proportioning drift goes undetected on the ramp, which explains how small, gradual errors slip past routine checks.
Suction-side reliability is also only as good as the agent flowing through it. Degraded or aged concentrate can thicken, gel, or separate, raising viscosity and making the pump work harder to draw it in, which brings you right back to a loss of prime. Understanding why temperature swings shorten foam agent shelf life helps technicians judge whether storage conditions, not the pump, are the real root cause.
Treat these two guides as the next steps in the sequence: confirm the suction side first, then verify proportioning accuracy and concentrate condition.
Frequently Asked Questions: ARFF Foam Pump Prime Loss
Why does the suction side cause foam pump prime loss more often than the discharge side?
The suction side operates under negative pressure, so even a tiny leak pulls air into the line rather than pushing fluid out, which breaks prime almost instantly. A discharge-side leak pushes foam outward and shows up as a visible drip, so it rarely kills prime at all. That pressure differential is why the suction side fails far more often than the discharge side.
How do I know if air is entering the suction line?
Watch for a pump that loses prime quickly, sounds like it is running dry, or delivers surging foam instead of a steady stream. Clear tubing, sight glasses, or the foam stream itself often reveal bubbles or froth, the classic signature of air ingress. Concentrate residue or a wet streak at a gasket or fitting is another reason to examine that joint, though under vacuum a suction leak pulls air in rather than weeping outward.
Can a clogged strainer alone cause loss of prime?
Yes. A blocked strainer restricts flow enough that the pump cannot draw concentrate, which presents as a loss of prime even when every gasket and coupling is sound. Inspect and clean the strainer first because it is the fastest and cheapest fault to rule out. If prime returns after cleaning, the strainer was the root cause.
How often should suction-side gaskets and couplings be inspected?
Inspect suction-side gaskets, couplings, and fittings at every scheduled foam system service and any time the pump loses prime. ARFF rigs sit idle for long periods and then run hard, so gaskets harden and crack between calls. Replace any gasket showing flattening, cracking, or hardness rather than reusing it.
Will a low concentrate level make a foam pump lose prime?
A low concentrate level can cause prime loss if the suction intake draws air once the liquid drops below the pickup. This is common when the tank is nearly empty or the vehicle sits on an incline, leaving the pickup exposed. Confirm tank level and slope before chasing mechanical faults, and keep an eye on foam concentrate storage conditions so the agent stays within spec.
What test confirms the suction path is airtight?
The standard check is a vacuum or pressure-hold test on the suction line: cap the intake, pull a vacuum, and see whether it holds. A steady reading confirms the suction side is airtight, while a falling gauge reveals the leak. You can then smoke-test or soap-test individual joints to pinpoint the exact failure.
Preventive Maintenance and Conclusion
When an airport crash tender reports foam pump prime loss, the fault almost always begins on the suction side, before concentrate ever reaches the pump. Air gets in through a compromised seal, a clogged strainer starves the inlet, or a delaminated hose lining collapses under vacuum. Because the root cause sits upstream, the most effective cure is not reactive repair but scheduled inspection of every suction-side component.
Field diagnostics point the same way: cracked gaskets, loose couplings, degraded hose linings, blocked strainers, and worn priming valves account for the majority of prime-loss events. These failures announce themselves early through slow pickup, intermittent cavitation, and repeated re-priming, long before a call-out.
Preventive Maintenance Checklist
- Every shift: Visually inspect suction hose and couplings for damage, loose clamps, or leaks; confirm the priming system engages smoothly.
- Weekly: Inspect strainer baskets and inlet screens for debris, foam residue, or corrosion, and clean as needed.
- Monthly: Examine gaskets and seals for cracking or hardening; pressure-test suction connections and verify hose lining integrity.
- Quarterly: Service and lubricate priming components such as valves and vacuum pumps; inspect for wear or air ingress.
- Annually: Run a full foam system flow test and replace degraded hoses, gaskets, and seals.
CIMC Fire Rescue is an international firefighting enterprise delivering intelligent ARFF vehicles, equipment, and service solutions across a strong global footprint. Its support programs, including scheduled maintenance, technician training, and genuine spare parts, help airports keep foam systems at readiness. Concentrate management matters just as much, so review how temperature swings shorten foam concentrate shelf life.
Treat every prime-loss complaint as a suction-side investigation first and fold the inspections above into your maintenance calendar, and most foam pump prime failures will be caught before they reach the runway.